Showing posts with label dyes. Show all posts

Thursday, May 21, 2015

A Lesson in Colors with Play Dough


Today my 2.5 year old and I made play dough in primary colors, which we then mixed together to make the secondary colors. There's something magical about putting a ball of red and a ball of blue together and watching it slowly swirl together in your fingers into purple. And then brown, because of course after that we mixed them all together (having a two year old is very hard on my perfectionist nature!). We used this no-bake play dough recipe from PBS with great results. I actually quartered it because that seemed like A LOT of dough. And it was. A quarter was just right for our purposes. To save you the trouble of the math, here're the amounts we used:
  • 1 c. flour
  • 1/3 c. salt (okay, technically, if you quarter the recipe it's 1/4 c and 2 tbsp, but 1/3 worked well.)
  • 1/4 c. water
  • 1 tbsp oil
  1.  Mix it all together. You might need a touch more oil and/or water during the mixing process. 
  2.  Divide the dough into 3 balls.
  3.  Use food coloring to make a ball of each red, blue, and yellow.
  4.  Divide each colored ball into 4 balls of each of those colors. 12 balls total.
  5.  Mix in different combinations two balls of different colors to get your secondary colors, and two of the same color to get your primary. Dividing it that way makes it so you roughly have the same amount of each color. (Hi, remember me from above, perfectionist?)
So now you have six  balls of six different colors.
  1.  red + red= red
  2.  red + yellow= orange
  3.  yellow + yellow= yellow
  4.  yellow + blue= green
  5.  blue + blue= (surprise!) blue 
  6.  blue+ red= purple (sort of, have you ever met a color more hard to mix than a nice purple???)
Tip: If your dough gets a little dry when you're playing around with it, just damped your hands and smoosh the balls around. It'll get right back to its original pliability. 


Monday, March 31, 2014

Rainbow Cookies


Well, we just had St. Patrick's Day, a bake sale and a preschool rainbow color picnic all in one week, so of course I was on a mission to make something extra festive and brilliant. So Rainbow Cookies it was! There were a couple recipes online but they were either in grams (and I don't have the patience to bother converting to good ol' cups and other measurements that only make sense to Americans.) or YouTube videos (who has the time to WATCH somebody else make cookies?! No thanks!) So I used my brain and my mom's Christmas cookie recipe (which has the bonus of me KNOWING it's delicious!).

   In comparison to my Mom's cookies which require rolling out, cutting, rolling out, cutting, rolling out, cutting, (and baking about a hundred cookie sheets), then frosting in a million colors (Granted, they're beautiful in the end, but I'm over it about halfway through), these cookies were a cinch. The stacking of the colors into an arch-shaped log isn't terribly thrilling and a little time consuming (about a half an hour to mix the colors and stack the log) but after chilling the log, you're home free with just slicing and baking. And they are ADORABLE! and BRILLIANT! And everybody will want to know how you did it!

I did this in two days to spare my sanity and what little time I have in a day between drop-off and drop-off and toddler-feeding (seriously this girl eats 5 meals a day.) and then pick-up and pick-up. And, yeah, I'll admit it, I do this stuff during the day because I hate to see my adult time get eaten up by baking for bake sales and picnics. Also, I am blessed with children who think baking time is quality hang time.

OK, so, really, this is


HOW YOU DO IT!
1. Mix up your butter cookie dough, or sugar cookie dough. To be honest, I'm not sure what kind of dough my mom's cookies are but it works and tastes delicious and that's all I need to know.
Here's the recipe I altered to make the rainbow cookies. The real recipe for Christmas Cookies to follow.


RAINBOW COOKIES

  • 1 c. softened unsalted butter
  • 1/2 c. sugar
  • 1 egg
  • 2 tsp vanilla
  • 3 cups sifted flour (Honestly, I just stir the flour in my canister before lightly spooning it into the cup, it's less of a pain in the caboose and the results are good.)
  • 1 tsp. baking powder
  • 1/2 tsp salt
Cream together butter, sugar, vanilla and egg. Sifte together flour, salt and baking powder. Stir together flour, salt and baking powder. 

Add flour mixture gradually to butter mixture.


2. Roll the dough into a cone-shaped log. Divide into 6 sections with each ball being slightly larger than the last. (Ignore that extra ball in the background of my picture, I was doing a double batch.)


3. Put a thumbprint in the middle of each ball and put your food coloring in. I used gel colors. It was a little less messy and the colors are more vibrant. The small ball is purple, then blue, green, yellow, orange, then red is the largest.


(again, ignore my doubles, I was doing that double batch.)


4. Roll the purple ball into a log about 1" in diameter. Mine was about 7-8" long.
 (In the end the log was about a foot, just so you know.)


5. With each subsequent color, flatten the ball into a rectangle that will wrap around the log to make an arch. This is about how mine measured out: blue was about 2.5" wide, then green was 3.25, yellow4, orange 4.75 and red 5.5. With each color getting about an inch longer with every addition, because the log gets stretch a little longer every time you wrap a new color. Really smoosh them on there so there hopefully won't be gaps between the layers.


Keep going....


Keep going....


Done!


6. Put the log into the refrigerator for at least an hour. I did overnight, so onto:


DAY TWO:

7. Preheat oven to 375*.

8. Take the log out of the fridge. Cut the ends off, taking off only as much as you can to make a nice flat surface on either end.


9. Cut the rest of the log into slices 1/4" thick. Sometimes you'll get gaps between the colors, I just kind of smoosh the back together gently, sometimes I rock the log back and forth along the arch to smoosh the colors together more before cutting. So far they don't fall apart after baking so take that for that's worth.


 10. Bake on parchment lined cookie sheets, leaving a little space between them, for 10 minutes or until edges just golden brown.


11. The bottoms of the rainbows will be a little pushed out, so while the cookies are warm cut off the bottom of each rainbow with a sharp knife to get a nice clean edge. Cool on wire racks.


I suppose Skittles might sue me if I say "Taste the rainbow," but look at these, how can I resist!?

Wednesday, September 5, 2012

Dying Rainbow Macaroni for Crafts

 I just felt the need to dye colorful macaroni and make necklaces with my octopi the other day. It turns out it's not at all hard to do. In fact it's easy and fun and the end result is brilliant!

We used rubbing alcohol to dye ours but I have read you can use vinegar as well which would be more friendly to kids who tend to put things in their mouths, but from our experience the alcohol worked really well to get vibrant colors. I haven't tried vinegar so I can't say if one's better than the other.

Pasta is a really cheap product. We bought a couple different varieties for a dollar a box- penne, ziti and ziti rigotti. Anything with a hole will work but the straighter pastas like the ziti rigotti and penne worked best for my 3 and 5 year olds for stringing so consider avoiding elbow macaroni when working with preschoolers.

This is a quick and easy project that little hands can lend a hand with. The dying alone is a family project. I like a craft where the process is just as fun as the product. Otherwise, what's the point?

And the projects you can DO with the end results are endless. Necklaces and mosaics. Christmas tree strings. They can be used for sorting shapes and colors and sizes. Counting, adding, subtracting. Practicing fine motor skills of stringing.

So.

Here's What You Need:
  • pasta with holes, straight tube-like pasta is best (although the slightly curved ziti did dye the best!)
  • food coloring in red, yellow, blue (and green cause that's how it comes you know!)
  • rubbing alcohol (we used isopropyl)
  • ziplock bags (we used freezer bags and they still seeped a little at the zippers, so beware and maybe double up!)
  • paper towels
  • 1 cup measuring cup
  • tablespoon


Here's What You Do:
  1. Decide how many different colors you are going to make and get out that many bags.
  2. In each bag, measure 1 tablespoon of rubbing alcohol.  (Or even a 1/2 tbs might be fine.)
  3. Drop 10-15 drops of food coloring in each bag of alcohol to make your colors.
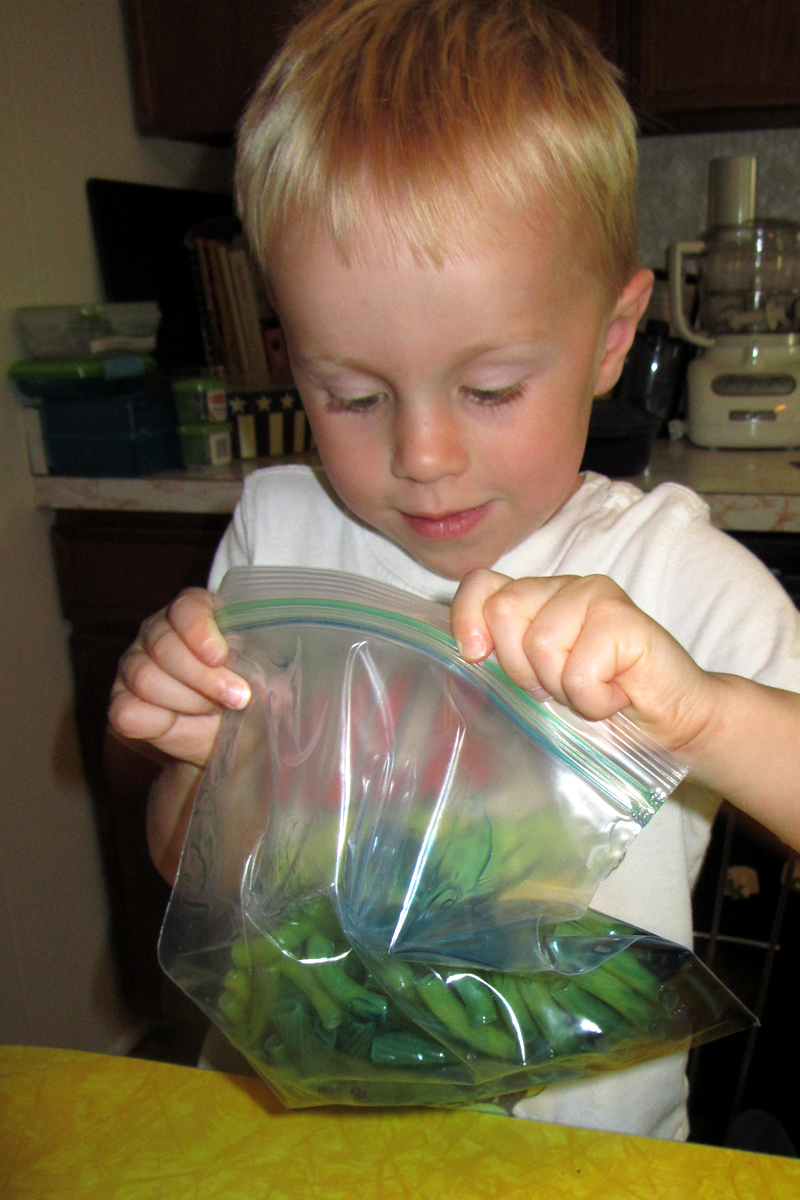
  4. Meanwhile have your octopus fill the one cup measuring cup with the pasta(s) of his choice. Heap it on there. Let him dump it all in one of the bags while you hold it up. (Don't let the dye out, yuck!)


5. Close it up realllll tight and let him squish that pasta all around in the dye.


6. Repeat with all your colors.


7. After they're mixed up really well, lie the bags flat on a paper towel-lined cookie sheet.


 8. Let them sit there for a couple hour, flipping every so often. *We did two and a half hours for the red, orange, yellow and green. But purple and blue just did not come out as well as I wanted (what're you gonna do- pasta is yellow in nature!) so I dyed them a second time in 1/2 tbs rubbing alcohol and more dye and repeated the process for another 2 hours. This time they came out nicely!*

9. When the pasta has reached your desired hues, drain out the excess liquid from the bags.

10. Dump each color of  pasta in one layer, not touching the other pastas, onto paper towel-lined cookie sheets, plates, whatever.

11. Let dry. If it's a sunny day put them out there and they will dry in no time! Our pasta was ready to use in 30 minutes on a hot sunny day.


12. Admire your beautiful pasta. I couldn't help but layer it all in a big jar like a rainbow. It was just so pretty too look at!


Making Necklaces with your Pretty Pasta.


Tie a piece of pasta onto the end of a length of yarn (a couple feet will do it.). Tape the other end for ease of stringing. Let your octopus get to work stringing macaroni. When he's all done, untie the pasta end, leave the pasta there or take it off, and tie the two ends together. Easy peasy.