Thursday, May 21, 2015

A Lesson in Colors with Play Dough


Today my 2.5 year old and I made play dough in primary colors, which we then mixed together to make the secondary colors. There's something magical about putting a ball of red and a ball of blue together and watching it slowly swirl together in your fingers into purple. And then brown, because of course after that we mixed them all together (having a two year old is very hard on my perfectionist nature!). We used this no-bake play dough recipe from PBS with great results. I actually quartered it because that seemed like A LOT of dough. And it was. A quarter was just right for our purposes. To save you the trouble of the math, here're the amounts we used:
  • 1 c. flour
  • 1/3 c. salt (okay, technically, if you quarter the recipe it's 1/4 c and 2 tbsp, but 1/3 worked well.)
  • 1/4 c. water
  • 1 tbsp oil
  1.  Mix it all together. You might need a touch more oil and/or water during the mixing process. 
  2.  Divide the dough into 3 balls.
  3.  Use food coloring to make a ball of each red, blue, and yellow.
  4.  Divide each colored ball into 4 balls of each of those colors. 12 balls total.
  5.  Mix in different combinations two balls of different colors to get your secondary colors, and two of the same color to get your primary. Dividing it that way makes it so you roughly have the same amount of each color. (Hi, remember me from above, perfectionist?)
So now you have six  balls of six different colors.
  1.  red + red= red
  2.  red + yellow= orange
  3.  yellow + yellow= yellow
  4.  yellow + blue= green
  5.  blue + blue= (surprise!) blue 
  6.  blue+ red= purple (sort of, have you ever met a color more hard to mix than a nice purple???)
Tip: If your dough gets a little dry when you're playing around with it, just damped your hands and smoosh the balls around. It'll get right back to its original pliability. 


Monday, February 9, 2015

Hugs and Hisses!-- Snake Pencil Valentines


I admit, I did look for boxed valentines at Target this year. But either I was very late getting to rummage through their valentine stock (It was already February 2nd, gasp!) or it just wasn't very impressive this year (due to the many dumpings of snow maybe?). At any rate, I had two options for the boys' school valentines. I actually think my nature-crazed eldest would have loved the googly-eyed animal ones, but that left superheroes for Fumble, and sadly my boys were in and over them in about two minutes. I can't remember the last time we DIDN'T do box valentines, (maybe back in 2012?), but these options were disappointing. Target could do better than this! We could do better than this! And then I thought, wait, why can't we make our own valentines? Ones we will actually LOVE to hand out!? Also, the idea of not traipsing in and out of drug store after drug store with a crabby toddler in the throes of TWO in favor of creativity was very appealing. I admit it.

My 7 year-old, Spiff, ranks snakes at the height (and beyond) of coolness right now. He talks about them all day long. And he has immense stamina when it comes to coloring and crafting, especially when it's something he's excited about. So I thought, let's do snake valentines. And of course you can't just give paper valentines any more. They have to come WITH something. So what would look like something a snake would hang off of. Tree. Branch. Stick. PENCIL.

Pinterest had this awesome pipecleaner pencil-slitherer to offer. Pretty awesome. Even though I didn't have enough pipecleaners, this one had me so pysched I was ready to go buy some. But wait. These would mean a lot of work for ME. And these aren't MY valentines. I'm a firm believer that kids should do more of their own gifting. I wanted Spiff to make his own mark. And so this cardstock creeper was born. I printed up a template and he colored them in. All 22 of them. He was so excited about it, I couldn't come down to make a pot of coffee in the morning without having to get some art supply out first.  So since he was so excited to do them, I'm so excited to share this craft. And if you have a snake-happy crafter like I do, I hope you enjoy making them as much as we did!

What You Need:
  • the printable printed up on card stock
  • hole punch
  • scissors
  • crayons, markers, etc.
  • brand-new pencils for gifting
What You Do:
  1. Color printed snakes. 
  2. Cut out snakes. 
  3. Hole punch gray circles.
  4. On back, write your message. We chose "Hugs and Hisses" since it's Valentine's Day and we like a good pun. ;-)
  5. Slide snake onto pencil tip first through the front, colored, side of the tail. gently bunch and slide snake up the snake towards the eraser until the snake looks like it's slithering up the pencil. 
  6. Gently fold, head down to lie flat-ish along pencil. 
  7. Gift!


 The Printable:


 Other awesome Snakey Sayings we came up with:
  • "Your Sssssuper!"
  • "Just Slithering by to say "Happy Valentine's Day!"
  • "Give me a squeeze, Valentine!"
  • "You'll make Hisssstory, Valentine!"


Tuesday, January 20, 2015

Baking Soda Snow

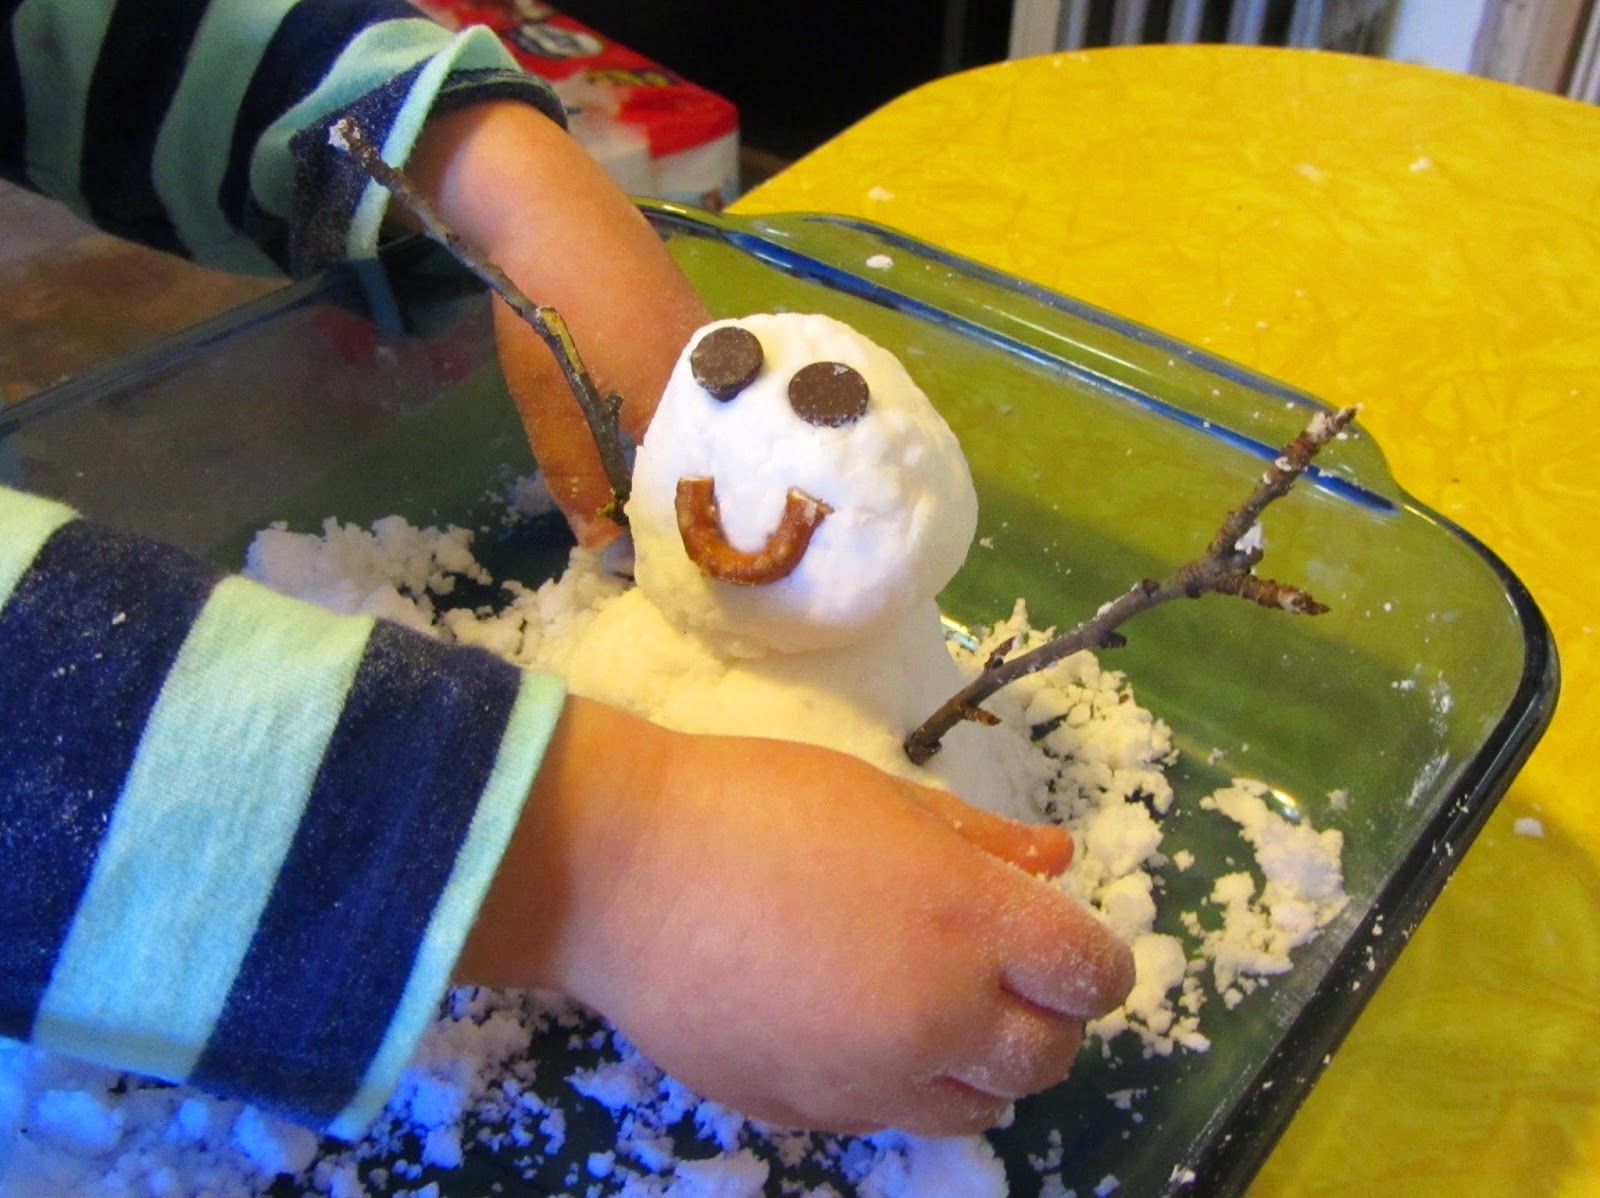
I love playing in the snow with the kids but we haven't had any this year and it's been  too c-c-c-old if there'd been any anyway. Fake snow INDOORS seemed like a good way to have some snow fun despite the lack of real snow.

I found this great recipe for baking soda snow on Momma's Fun World.  This stuff is mold-able just like the real stuff and is completely safe. It is made from two ingredients I already had handy- baking soda and conditioner- so that's always a win for me. And it keeps. Stick it in a tupperware container or, like we did, play with it in a baking dish that has a lid and pop the lid on it when you're through. A month later and it was still in great shape. The pictures show just a half-batch of the snow to give you an idea.

 My 2 year old had such a great time making snowmen (Use twigs or pipecleaners for arms, choc. chips and pony beads for buttons and eyes) and playing treasure hunt in the snow with some buttons and "gems" we have hanging around. (Don't put anything in there you wouldn't want the finish to get "polished" off of- it is baking soda after all.) Both my 5 and 7 year old played with it when they got home from school and loved playing with it just as much. A lot of bang for little buck an little effort. I definitely recommend trying it!


What You Need (for a full batch; we only did a half.):
  • 3c. baking soda
  • 1/2 c. white conditioner (We used the Sauve Kids 3-1 because that's what we had on hand and it worked great.)

What You Do:
  • Mix it up using a fork or your hands, adding more conditioner if necessary.
  •  Play!
  •  You can pop it in a resealable container when you're done and use it over and over again, though you might have to add a little more conditioner to refreshen it.