Thursday, May 21, 2015

A Lesson in Colors with Play Dough


Today my 2.5 year old and I made play dough in primary colors, which we then mixed together to make the secondary colors. There's something magical about putting a ball of red and a ball of blue together and watching it slowly swirl together in your fingers into purple. And then brown, because of course after that we mixed them all together (having a two year old is very hard on my perfectionist nature!). We used this no-bake play dough recipe from PBS with great results. I actually quartered it because that seemed like A LOT of dough. And it was. A quarter was just right for our purposes. To save you the trouble of the math, here're the amounts we used:
  • 1 c. flour
  • 1/3 c. salt (okay, technically, if you quarter the recipe it's 1/4 c and 2 tbsp, but 1/3 worked well.)
  • 1/4 c. water
  • 1 tbsp oil
  1.  Mix it all together. You might need a touch more oil and/or water during the mixing process. 
  2.  Divide the dough into 3 balls.
  3.  Use food coloring to make a ball of each red, blue, and yellow.
  4.  Divide each colored ball into 4 balls of each of those colors. 12 balls total.
  5.  Mix in different combinations two balls of different colors to get your secondary colors, and two of the same color to get your primary. Dividing it that way makes it so you roughly have the same amount of each color. (Hi, remember me from above, perfectionist?)
So now you have six  balls of six different colors.
  1.  red + red= red
  2.  red + yellow= orange
  3.  yellow + yellow= yellow
  4.  yellow + blue= green
  5.  blue + blue= (surprise!) blue 
  6.  blue+ red= purple (sort of, have you ever met a color more hard to mix than a nice purple???)
Tip: If your dough gets a little dry when you're playing around with it, just damped your hands and smoosh the balls around. It'll get right back to its original pliability. 


Monday, February 9, 2015

Hugs and Hisses!-- Snake Pencil Valentines


I admit, I did look for boxed valentines at Target this year. But either I was very late getting to rummage through their valentine stock (It was already February 2nd, gasp!) or it just wasn't very impressive this year (due to the many dumpings of snow maybe?). At any rate, I had two options for the boys' school valentines. I actually think my nature-crazed eldest would have loved the googly-eyed animal ones, but that left superheroes for Fumble, and sadly my boys were in and over them in about two minutes. I can't remember the last time we DIDN'T do box valentines, (maybe back in 2012?), but these options were disappointing. Target could do better than this! We could do better than this! And then I thought, wait, why can't we make our own valentines? Ones we will actually LOVE to hand out!? Also, the idea of not traipsing in and out of drug store after drug store with a crabby toddler in the throes of TWO in favor of creativity was very appealing. I admit it.

My 7 year-old, Spiff, ranks snakes at the height (and beyond) of coolness right now. He talks about them all day long. And he has immense stamina when it comes to coloring and crafting, especially when it's something he's excited about. So I thought, let's do snake valentines. And of course you can't just give paper valentines any more. They have to come WITH something. So what would look like something a snake would hang off of. Tree. Branch. Stick. PENCIL.

Pinterest had this awesome pipecleaner pencil-slitherer to offer. Pretty awesome. Even though I didn't have enough pipecleaners, this one had me so pysched I was ready to go buy some. But wait. These would mean a lot of work for ME. And these aren't MY valentines. I'm a firm believer that kids should do more of their own gifting. I wanted Spiff to make his own mark. And so this cardstock creeper was born. I printed up a template and he colored them in. All 22 of them. He was so excited about it, I couldn't come down to make a pot of coffee in the morning without having to get some art supply out first.  So since he was so excited to do them, I'm so excited to share this craft. And if you have a snake-happy crafter like I do, I hope you enjoy making them as much as we did!

What You Need:
  • the printable printed up on card stock
  • hole punch
  • scissors
  • crayons, markers, etc.
  • brand-new pencils for gifting
What You Do:
  1. Color printed snakes. 
  2. Cut out snakes. 
  3. Hole punch gray circles.
  4. On back, write your message. We chose "Hugs and Hisses" since it's Valentine's Day and we like a good pun. ;-)
  5. Slide snake onto pencil tip first through the front, colored, side of the tail. gently bunch and slide snake up the snake towards the eraser until the snake looks like it's slithering up the pencil. 
  6. Gently fold, head down to lie flat-ish along pencil. 
  7. Gift!


 The Printable:


 Other awesome Snakey Sayings we came up with:
  • "Your Sssssuper!"
  • "Just Slithering by to say "Happy Valentine's Day!"
  • "Give me a squeeze, Valentine!"
  • "You'll make Hisssstory, Valentine!"


Tuesday, January 20, 2015

Baking Soda Snow

I love playing in the snow with the kids but we haven't had any this year and it's been  too c-c-c-old if there'd been any anyway. Fake snow INDOORS seemed like a good way to have some snow fun despite the lack of real snow.

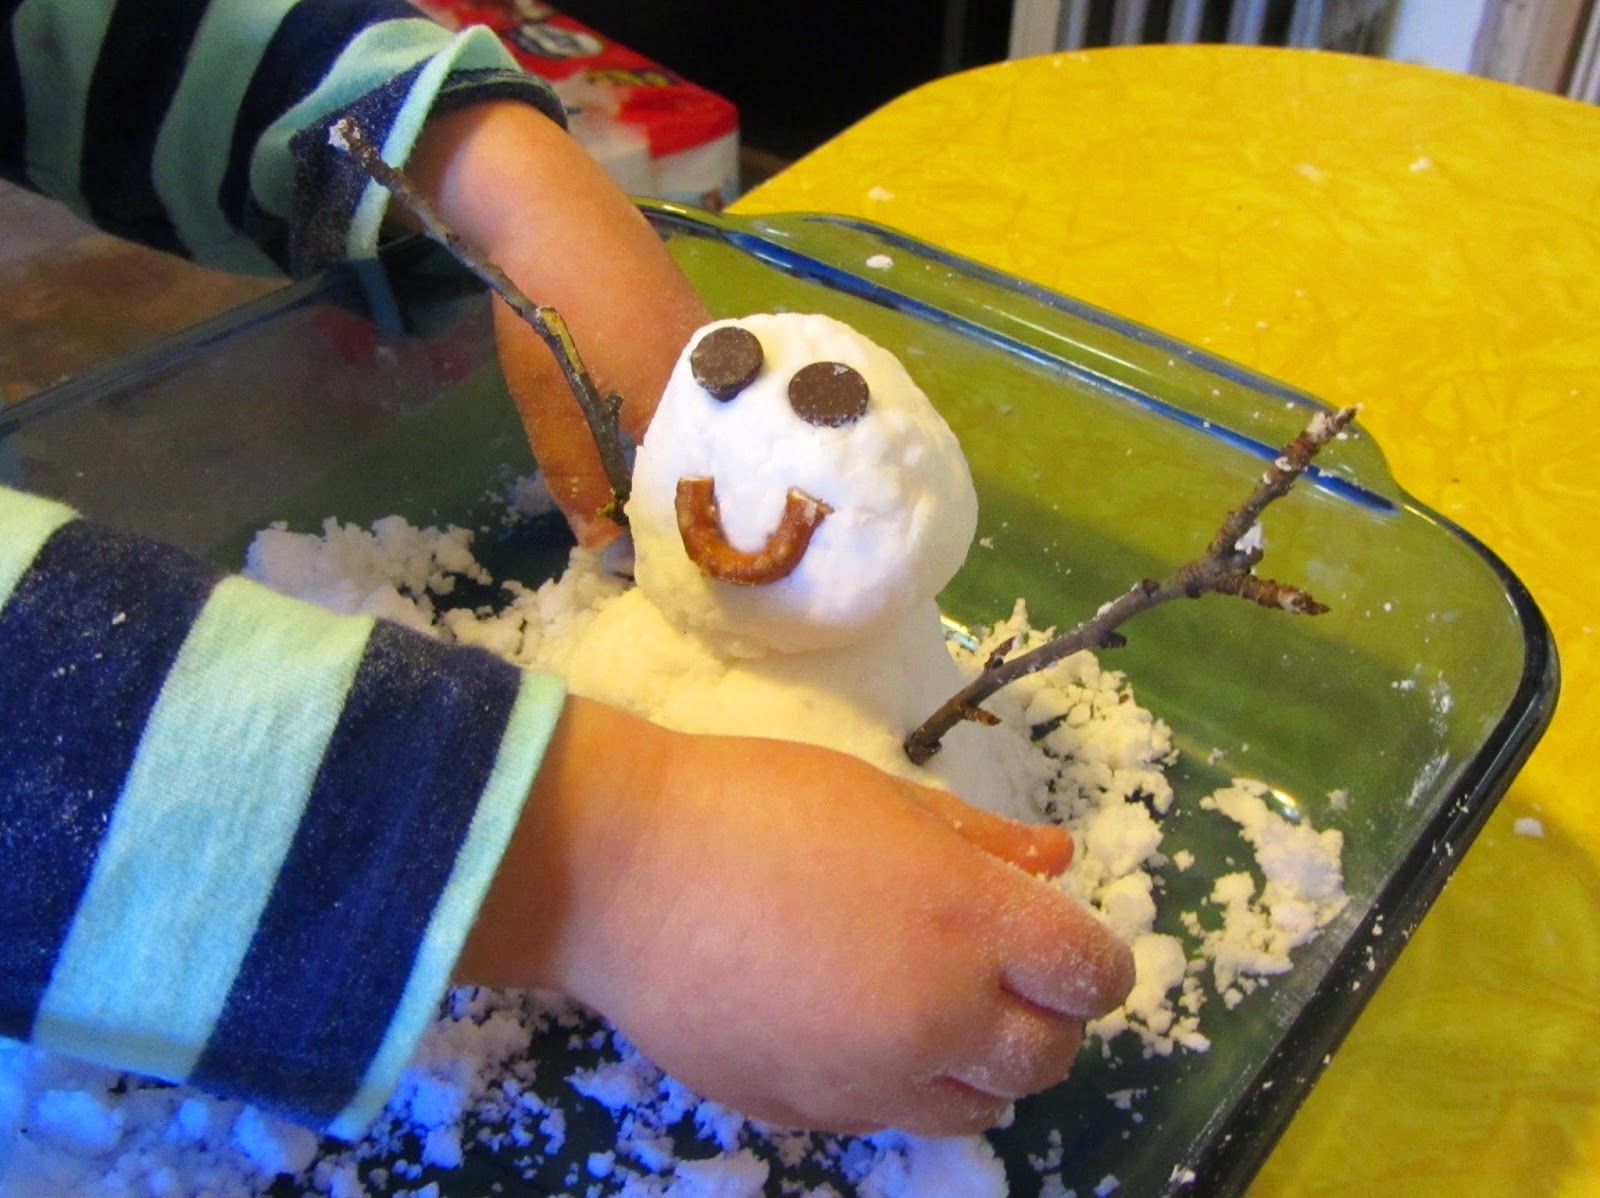
I found this great recipe for baking soda snow on Momma's Fun World.  This stuff is mold-able just like the real stuff and is completely safe. It is made from two ingredients I already had handy- baking soda and conditioner- so that's always a win for me. And it keeps. Stick it in a tupperware container or, like we did, play with it in a baking dish that has a lid and pop the lid on it when you're through. A month later and it was still in great shape. The pictures show just a half-batch of the snow to give you an idea.

 My 2 year old had such a great time making snowmen (Use twigs or pipecleaners for arms, choc. chips and pony beads for buttons and eyes) and playing treasure hunt in the snow with some buttons and "gems" we have hanging around. (Don't put anything in there you wouldn't want the finish to get "polished" off of- it is baking soda after all.) Both my 5 and 7 year old played with it when they got home from school and loved playing with it just as much. A lot of bang for little buck an little effort. I definitely recommend trying it!


What You Need (for a full batch; we only did a half.):
  • 3c. baking soda
  • 1/2 c. white conditioner (We used the Sauve Kids 3-1 because that's what we had on hand and it worked great.)

What You Do:
  • Mix it up using a fork or your hands, adding more conditioner if necessary.
  •  Play!
  •  You can pop it in a resealable container when you're done and use it over and over again, though you might have to add a little more conditioner to refreshen it.


Monday, December 1, 2014

Keepsake Baby's 1st Christmas Star


I collected the tags and scraps of the wrapping paper from the presents each of my children received on their first Christmases. From these I made keepsake Christmas stars that we put on our Christmas tree tops each year. One day my kids will take their own special stars and put them on their own Christmas trees when they are adults with their own homes. (I hope!) Here's how I did it.

I traced and cut out a *perfect* 5 point star out of heavy cardboard (matboard or heavy cardboard from the back of used up notepad will work. I've used both.). I was nitpicky the first star and then every star after that I traced from the original so that I am sure my third kid's star is a lot less perfect. (That's what happens, right?) But, if you want to have a guide or are a little bit of a perfectionist, use a protractor to make a pentagon (the base of your star) with interior angles of 108*. Then extend your lines beyond that until they meet to make your star's points. My stars have a pentagon base with each side being about 2.5" with the end result being a star that has a diameter (you know, if you stuck it in a circle.) of 10". (My high school math teacher sister is cringing I am sure.)

You could also do something like this and use it as a template for your cardboard.

Now, let's forget math because we don't need it any more. That's right, now it gets fun.

Rip and tear your wrapping paper so you have nice larger pieces and smaller pieces to collage on your star. Swab on some modpodge* put down some paper (using the bigger pieces first for a base) and swab over it. Wrap some around your edges and do both sides. It helps to focus on one side and then when that side is dry do the other side. Paste of sticker tags in the same manor.

Card tags, open and mod podge both sides and let dry. Then modpodge the back onto the star and glue over the right side of the interior (where people usually write) so that the flap can be opened later and the message read.

And that's it. Really simple and sweet.

Out of a heavy gauge wire I made a spiral in the shape of a cone that could fit over the top of a tree. At the top I twisted two loops between which would fit one of the angles of the star. Hope that makes sense.


*You can make your own modpodge with equal parts white glue and water. Shake them together in a jar with a screw top lid.

Thursday, October 30, 2014

Jack O' Clementines

How awesome is this?


A Halloween lunch bag snack that is both nutritious and takes 5 seconds to whip up? Sign me up!

Thursday, October 16, 2014

Halloween Jokes for Kids

This is not a crafting post but I thought I would share our favorite Halloween jokes! Every day I send a note in my older son's lunch with a joke on it (Admittedly, I repeat them after a couple of weeks. I only know so many good ones.) and this month we've been enjoying the Halloween themed ones. Here's a countdown to Halloween with 15 jokes for 15 days!

1. -Knock Knock!
   - Who's there?
   - BOO!
   - "Boo" who?
   - Oh, don't cry! It's only a joke!

2. What kind of witch goes to the beach for vacations?
    - A sandwich! 

3. What does a monster call his mother?
    - Mummy.

4. Why wasn't there any food left at the Halloween party?
   -Because everybody was goblin'.

5. Why wouldn't the skeleton cross the road?
    -Because he didn't have any guts!

6. What do you call a nervous witch?
    -A twitch!

7. Why didn't the vampire like the bumper cars?
    - They drove him batty!

8. What kind of horse does a ghost ride?
    -a night mare!

9.  What did the skeleton order with his drink?
     -a mop.

10. What do you get when you cross a ghost with a reindeer?
      - a cariboo!

11. What do you get when you cross a snowman with a vampire?
     - frostbite!

12. What kind of streets do zombies live on?
     - dead ends!

13. What subject is a witch's favorite?
     -Spelling!


14. What do you call it when a black cat falls off its witch's broomstick?
     - A catastrophe!

15. Why didn't the skeleton laugh at these jokes?    -Because he lost his funny bone!

Wednesday, October 1, 2014

Peek-a-boo Card: Haunted House

It's OCTOBER! That means we really get to dive into Halloween! One of my favorite holidays for sure! Candy, costumes, COLOR! All good things start with C. Cookie Monster and I are of the same mind.

And CARDS! We love making and mailing cards. They are a great, fun craft and a fantastic way to show your love. Who doesn't like getting a card in the mail? Nobody, that's who.

This is a neat lift-the-flap card that my octopi and I designed together especially for our favorite people last Halloween. (And I had to wait a WHOLE year to post it, do you know how hard that was for me!? Do you!?)

It was a fun project the kids really got into and allowed them to put as much craziness into it as they wanted while making a really cool finished product they felt pretty proud of. (So did I, I admit it.) The materials are basic, the result awesome. Just how we like our projects around here.


What You Need:

  • Card stock. We cut ours to fit a business envelope when it was folded, so 8.5"x8" or you can use the pre-drawn printable at the bottom if your octopi just want to color.
  • Gluestick
  • Exact-o knife or craft knife
  • crayons, markers, etc.

What You Do:
  1. Take your cardstock and fold in half so it's 8.5"x 4".
  2. On the front of the card, draw your haunted house with nice good-sized windows that will be easy to cut, big enough to draw a cute picture inside but small enough to fit a few peek-a-boo windows. We found 6-8 1"-1.5" windows to be a good size but it doesn't really matter so long as there's enough room around the windows to glue and seal up the card.
  3. Unfold your card and putting your card window-up on a cutting surface, cut out the windows on 3 sides (top, bottom, right) so to make flaps that open and shut.
  4. Open up all the flaps and refold the card so you see the underside. Trace out the window openings. 
  5. Open up the card and have your octopus color monsters in each of the traced out boxes. It helped my younger octopus if I colored around the windows so he knew what NOT to color. Those areas won't be seen once you seal up the card.
  6. On the inside, glue all around the windows and along all the edges of the card.
  7. Fold the front over the glued inside and seal it up.
  8. Now have your octopus color the outside of the haunted house.
  9. Peek-a-boo!


The printable: