Showing posts with label rainy day fun. Show all posts

Wednesday, February 6, 2013

Rainbow Crayons

 
We love to recycle our broken crayons. It seems a waste to throw them away, but who needs broken crayons!? For our valentines this year we made heart shaped crayons with our old, broken crayons. It's very easy and fun to do and you don't need much to do it! There are a lot of ways to do this, but with all the "recipes" all you need is some old broken crayons and a silicone mold (and an oven.).


What You Need:
  • old broken crayons (if you have little kids, you have these.)
  • silicone mold with fun shapes. (You might want to forever designate these to crafting afterward and you can buy cheapy molds at Ikea or Target. I got mine at Target a few years ago in the dollar area.)
  • Knife and cutting board for very thick crayons.


What You do:
1. Peel all the paper off the old, broken crayons.

2. Break them up some more. You may need to cut extra thick crayons with a knife, they're tough to break, but the thin ones are a snap. (literally!) At this point my kids had a great time sorting them into piles of different colors.

3. Have your Octopi fill the molds with bits of crayons. You can do different shades of the same color, do different colors for a swirly rainbow effect, or do themed crayons like "fall" with reds and yellows and oranges and "night" with dark blues and purples and bits of silver for stars.


4. Put the filled molds into a preheated 200* oven just until the crayons melt. Keep an eye on your crayons. They'll take about 15-20 minutes to melt. The kids had a fun time coming to see them melt at different stages.


 5. When melted take the molds out to cool on the counter or put in the freezer to speed the process. Be very careful when taking the molds out of the oven, melted wax is very flimsy and super hot!

6. When cool and hard, pop the crayons out of the molds.

7. Color! Or double stick tape to cards made from card stock with phrases like "You color my world" and "You melt my heart" and gift to other Octopi for Valentine's Day.


*Tip: To clean your silicone molds, spill a little oil in the tray and swish it around. Let is stand for a little bit then scrub our your trays with soap and water. It really cleans up pretty well.

Wednesday, September 5, 2012

Dying Rainbow Macaroni for Crafts

 I just felt the need to dye colorful macaroni and make necklaces with my octopi the other day. It turns out it's not at all hard to do. In fact it's easy and fun and the end result is brilliant!

We used rubbing alcohol to dye ours but I have read you can use vinegar as well which would be more friendly to kids who tend to put things in their mouths, but from our experience the alcohol worked really well to get vibrant colors. I haven't tried vinegar so I can't say if one's better than the other.

Pasta is a really cheap product. We bought a couple different varieties for a dollar a box- penne, ziti and ziti rigotti. Anything with a hole will work but the straighter pastas like the ziti rigotti and penne worked best for my 3 and 5 year olds for stringing so consider avoiding elbow macaroni when working with preschoolers.

This is a quick and easy project that little hands can lend a hand with. The dying alone is a family project. I like a craft where the process is just as fun as the product. Otherwise, what's the point?

And the projects you can DO with the end results are endless. Necklaces and mosaics. Christmas tree strings. They can be used for sorting shapes and colors and sizes. Counting, adding, subtracting. Practicing fine motor skills of stringing.

So.

Here's What You Need:
  • pasta with holes, straight tube-like pasta is best (although the slightly curved ziti did dye the best!)
  • food coloring in red, yellow, blue (and green cause that's how it comes you know!)
  • rubbing alcohol (we used isopropyl)
  • ziplock bags (we used freezer bags and they still seeped a little at the zippers, so beware and maybe double up!)
  • paper towels
  • 1 cup measuring cup
  • tablespoon


Here's What You Do:
  1. Decide how many different colors you are going to make and get out that many bags.
  2. In each bag, measure 1 tablespoon of rubbing alcohol.  (Or even a 1/2 tbs might be fine.)
  3. Drop 10-15 drops of food coloring in each bag of alcohol to make your colors.
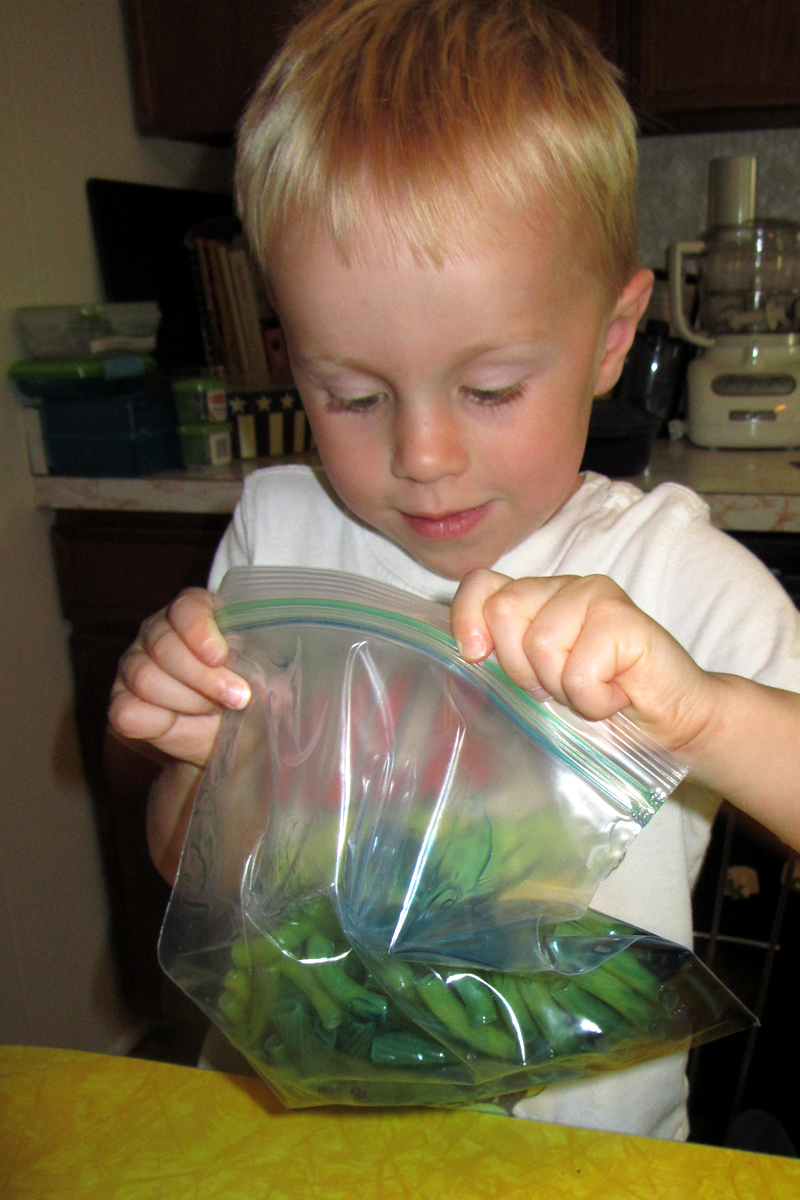
  4. Meanwhile have your octopus fill the one cup measuring cup with the pasta(s) of his choice. Heap it on there. Let him dump it all in one of the bags while you hold it up. (Don't let the dye out, yuck!)


5. Close it up realllll tight and let him squish that pasta all around in the dye.


6. Repeat with all your colors.


7. After they're mixed up really well, lie the bags flat on a paper towel-lined cookie sheet.


 8. Let them sit there for a couple hour, flipping every so often. *We did two and a half hours for the red, orange, yellow and green. But purple and blue just did not come out as well as I wanted (what're you gonna do- pasta is yellow in nature!) so I dyed them a second time in 1/2 tbs rubbing alcohol and more dye and repeated the process for another 2 hours. This time they came out nicely!*

9. When the pasta has reached your desired hues, drain out the excess liquid from the bags.

10. Dump each color of  pasta in one layer, not touching the other pastas, onto paper towel-lined cookie sheets, plates, whatever.

11. Let dry. If it's a sunny day put them out there and they will dry in no time! Our pasta was ready to use in 30 minutes on a hot sunny day.


12. Admire your beautiful pasta. I couldn't help but layer it all in a big jar like a rainbow. It was just so pretty too look at!


Making Necklaces with your Pretty Pasta.


Tie a piece of pasta onto the end of a length of yarn (a couple feet will do it.). Tape the other end for ease of stringing. Let your octopus get to work stringing macaroni. When he's all done, untie the pasta end, leave the pasta there or take it off, and tie the two ends together. Easy peasy.


Monday, August 6, 2012

Campfire Craft


 I'm not sure how it happened really. One minute we got the tent out from its hiding place under the couch. (If you don't stow stuff under there you should!) and then we were making a lake out of blue blankets and crafting a campfire out of paper for roasting cotton ball marshmallows. In the end, "camping" became quite the creative production. And it's even better because in a couple weeks I won't feel that badly about throwing it out- provided I can sneak it past the bosses.

The boy scouts are good campfire builders. We are good pretend fire builders. Smokey would be proud. And this is how we did it.


What You Need:

for your fire:
  • red and orange construction paper
  • scissors
  • glue and maybe scotch tape

Here's What You Do:
  1. 1. To make your fire: Cut out flames the long way out of your construction paper, leaving the bottom edge nice and straight and untouched. I drew out an easy zigzag flame shape and handed it over to my 4 year old to cut- good practice! 
  2. Out of leftover scrap, cut more flame shapes and paste them onto the bigger pieces here and there and wherever.
  3. glue the edge of one side onto the edge of the other side so you have a ring of fire.
  4. Cut out little u-shaped mouse holes along the bottom edge for your "firewood" to go through so the fire stands nice and straight on top instead of falling over.


for your kindling and fire wood:
  • brown paper
  • glue and some scotch tape
  • scissors

What You Do:
  1. Cut your brown paper into varying widths by 9" or so. Honestly, it's not a science and I have no idea what length we cut. 
  2. Roll each strip nice into a stick and glue it closed or tape it shut. We did both. It did not want to stay.
  3. Stick your sticks through the mouse holes you cut in your fire to make it look like they're on, well, fire.


for your marshmallows on a stick:
  • brown pipe cleaners
  • cotton balls
  • white electrical tape to keep the balls neat
  • scissors.

What You Do:
  1. Snip your cotton balls from top to bottom but only half-way through so that you can "unroll" them a little. 
  2. Wrap the snipped cotton balls around your pipe cleaner. 
  3. Wrap a length of white electrical tape around the marshmallow to help it keep its marshmallowy form. (We experimented and did some on the top and bottom of the marshmallows too but really it just looked better when we wrapped the sides of the cylinder in one go and it was way easier to do too.) Now you'll be able to pull on and off your untoasted and roasted marhsmallows to eat right up.
  4. Roast those puppies over your fire.


Who knows, maybe you can even con your kids into taking a nap "under the stars" when they're done. I wish I had!